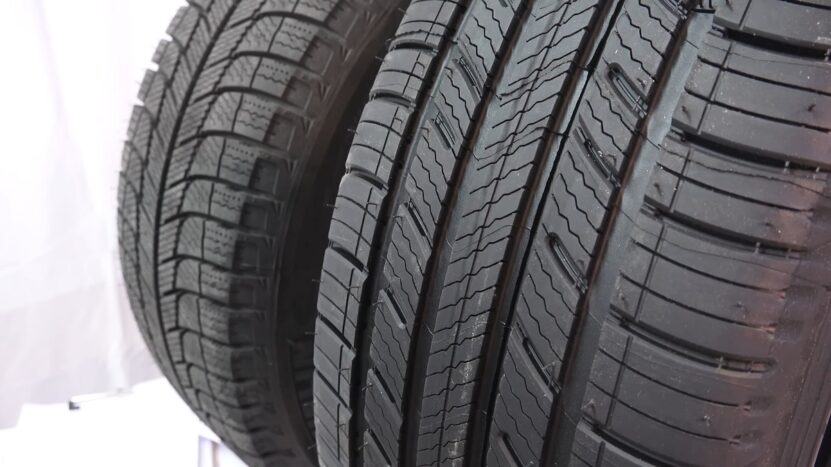
Swapping seasonal tires is one of those necessary evils. Ignore it, and you’ll either be sliding around like a hockey puck in winter or burning through rubber in summer.
But if done carelessly, you might end up scratching, denting, or outright ruining your rims. Here’s how to do it right—without causing unnecessary headaches.
Safety and Basic Preparations
No one wants to read about injuries, so common sense is vital. A stable surface is your stage, and sturdy equipment is your best friend. Take a glance at the points below and feel free to nod in agreement:
Pick the Right Spot
Flat, solid ground is your best friend. A garage floor or paved driveway works. Grass, gravel, or uneven surfaces? Bad idea. Your jack could tip, and suddenly, you are dealing with a much bigger problem.
Watch the Weather
Swapping tires in the rain or on ice is an easy way to end up with scraped knuckles or a banged-up car. Wind can also knock over tools or send dirt flying into your eyes. If you have to do it outside, pick a dry, calm day.
Also, learn more about proper timing for getting new tires related to the season.
Dress for the Job
A loose hoodie might be comfortable, but it can get caught on something. Sandals? No. Steel-toe boots are overkill, but solid, non-slip shoes keep you stable. Gloves protect your hands from sharp edges, grease, and your own mistakes.
Know Your Car
Every vehicle has proper jack points. Ignore them, and you risk denting something expensive. If you have never checked before, grab the manual. No shame in making sure you are lifting it the right way.
Have a Backup Plan
A jack is strong—until it is not. A second jack or extra wheel chocks give you insurance against an accident. A flashlight helps if you are working in dim light. A first-aid kit should always be within reach, because bleeding on your tools does not make you tougher.
Essential Tools to Avoid a Disaster
An amateur might try switching tires with a handful of random tools lying around the garage. A wise soul, on the other hand, invests in gear that doesn’t fail halfway through the task. Gather the following:
- Hydraulic floor jack: Way more reliable than the flimsy emergency contraption found under the trunk mat.
- Jack stands: Who wouldn’t want a stable backup in case the jack decides to spontaneously collapse?
- Lug wrench: A cross wrench offers better leverage.
- Torque wrench: Nobody likes over-torqued or under-torqued lug nuts. That’s a recipe for future problems on the highway.
- Wheel chocks: Already mentioned, but worth repeating. Every trustworthy operation needs them.
- Gloves: Helps protect your hands from grime, cuts, and your own clumsy moves.
Also – Learn more about how long can you drive on a spare tire.
Loose the Lug Nuts
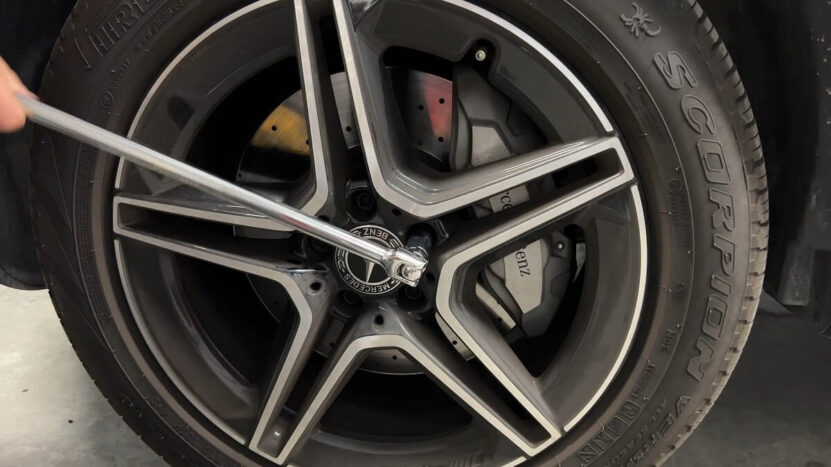
We’ve all seen the hero in the movies cranking on lug nuts after the car is already in the air. That’s a brilliant method for making your wheel spin while you end up cursing. Avoid the frustration.
Use the Right Tool
A standard lug wrench works, but a cross wrench or breaker bar gives better leverage. If you drive a truck or SUV, an extendable lug wrench makes life easier. Those factory wrenches tucked in the trunk? Usually too short and flimsy.
Stand Your Ground
Plant your feet and keep a firm grip on the wrench. If the nuts are stubborn, use controlled pressure instead of quick, jerky movements. Yanking hard can lead to scraped knuckles when the nut suddenly gives way.
Avoid Overkill
A half-turn is enough. No need to fully remove them yet. Breaking them loose now makes unscrewing easy once the wheel is off the ground.
Dealing with Stuck Lug Nuts
Rust, corrosion, or a shop that over-tightened them with an impact wrench can turn a simple task into a struggle. If a lug nut refuses to budge:
- Use penetrating oil and let it sit for a few minutes.
- Apply steady pressure with a breaker bar instead of bouncing on the wrench.
- If all else fails, a quick tap with a rubber mallet on the wrench handle can help break the bond.
Lift the Vehicle Without Incidents
After those lug nuts are loosened, elevating the car becomes the next carnival act. Do it wrong, and you’ll discover how quickly metal can slip or bend under stress.
For a safe and efficient lifting process, consider the two-post lifts available at www.johnbean.com.
Jack Positioning Magic
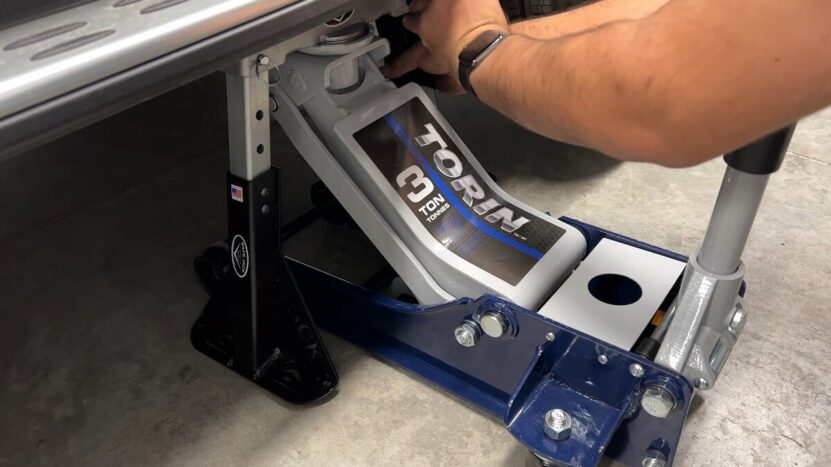
Cars might look uniform underneath, but recommended jacking points exist for a reason. Look them up in the manual, or check along the car’s pinch welds or frame rails if you’re feeling extra adventurous. Once a spot is found:
- Slide the jack under: Double-check alignment. Aim for a perpendicular approach to the ground. Crooked angles lead to comedic yet tragic fails.
- Pump slowly: That fancy handle might tempt you to race, but a slow and controlled lift is safer.
Elevating and Securing
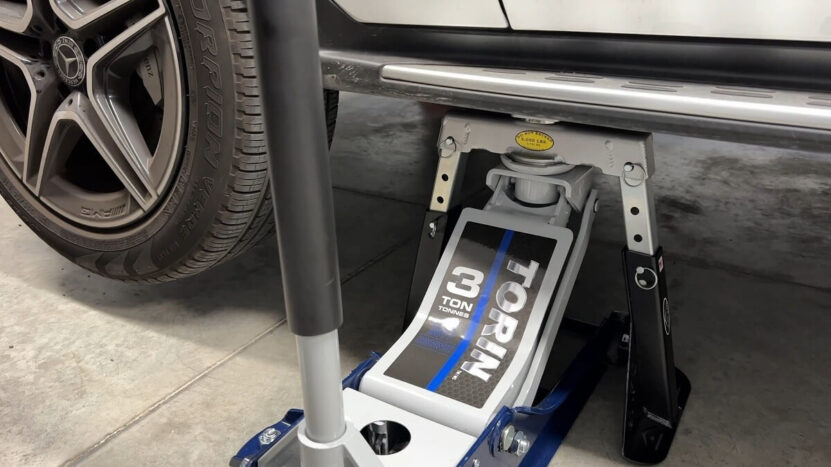
Getting the car in the air is step one. Making sure it stays there is step two. Overly confident folks might skip the part about jack stands, but any seasoned mechanic knows better:
1. Raise the Car About an Inch off the Ground
That’s usually enough clearance to remove the wheel without reenacting a monster truck rally.
2. Slide Jack Stands Under
Place them near the jack point for added support. Steel tubes are much better at holding the weight than your illusions of invincibility.
3. Lower Gently Onto the Stands
If the car wobbles alarmingly, reset everything. It’s an inconvenient extra step that just might save your limbs.
Remove the Wheel
Once the tire hovers above the ground, lug nuts can come off fully. You might think it’s as easy as twisting them loose, but there’s still potential for slip-ups.
Handle Lug Nuts with Finesse
- Unscrew each nut: Place them in a safe spot. They look identical, so losing one means you’re hunting through the yard with a flashlight later.
- Pull the wheel straight off: Should it refuse to budge, approach with caution. Excessive force can hurt the rim.
- Deal with stuck wheels: Use a rubber mallet on the tire’s backside. A few gentle taps help break corrosion bonds. Apply a penetrating lubricant near the hub if it’s truly stubborn, then wait a bit before trying again.
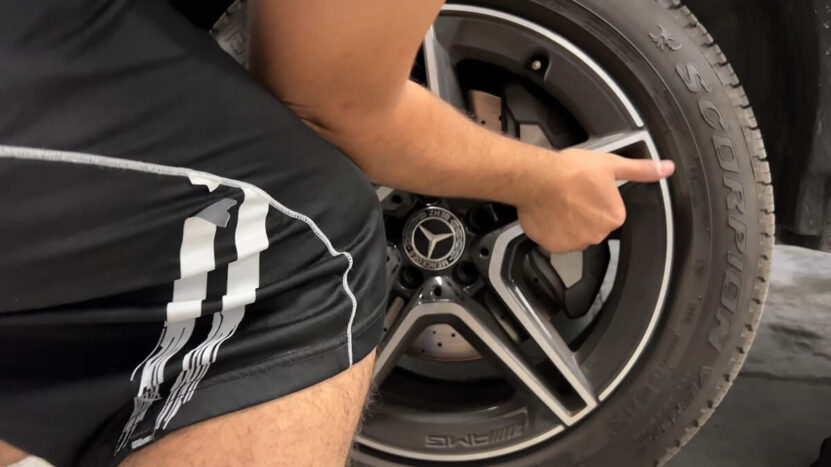
Rim Inspection and Cleanup
A new seasonal tire is pointless if the mating surfaces look like a corroded relic from a scrapyard. Scratches, debris, or rust can sabotage the overall performance.
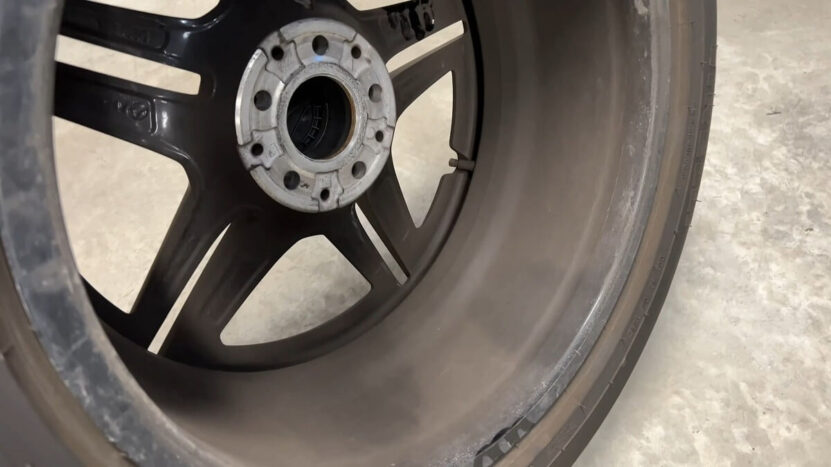
Eliminating Corrosion and Grime
- Examine the hub and inside the rim: Look for rust, caked-on dirt, or any sign of damage. Lumps of grime don’t mix well with smooth mounting surfaces.
- Clean thoroughly: A wire brush or fine sandpaper works wonders. Minor rust flecks or dirt lumps can cause fitment issues, leading to vibrations later.
- Inspect rim edges: Small bends can evolve into major problems. A cracked rim is like a ticking time bomb. If there’s a noticeable imperfection, get it repaired or replaced.
- Optional anti-seize or dielectric grease: A light coat around the hub center is often suggested by certain gearheads to prevent future sticking. Just avoid slathering it on the lug stud threads or brake rotor.
Mount the Seasonal Tire Safely
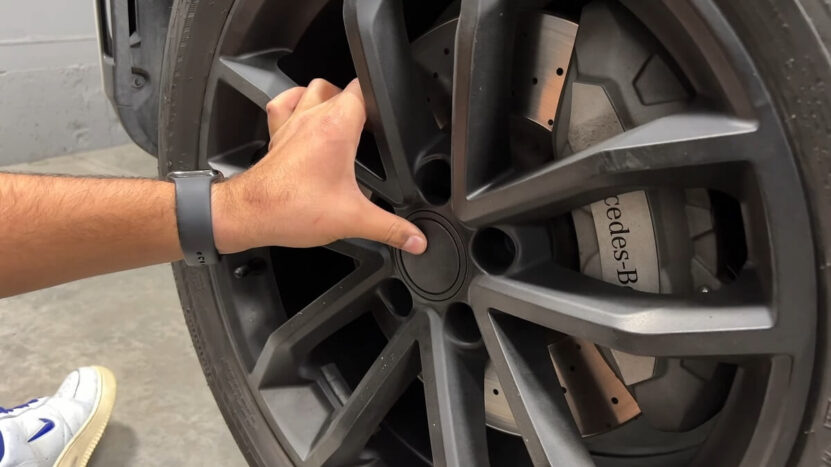
Nothing ruins the mood faster than scratching up your rims because you got impatient. A little care saves a lot of regret.
Line It Up Like You Mean It
No need to guess—line up the bolt holes with the lug studs before doing anything else. Trying to force it on without checking first is how rims get gouged and threads get wrecked.
Slide, Don’t Slam
The wheel needs to go on smoothly, not like you are throwing it at the hub. Guide it in place with steady hands. The second the studs poke through, make sure the rim sits flush. If it is crooked, stop and fix it before it turns into a bigger problem.
Start with Your Hands
Lug nuts need to be hand-threaded first. If you cross-thread them, you will hate yourself later when one refuses to come off—or worse, strips completely. If a nut does not spin on easily, take it off and try again.
Tighten the Lug Nuts the Right Way
Too loose, and the wheel could come off. Too tight, and you are looking at stripped threads, warped rotors, or a nightmare next time you need to remove them. Do it right the first time.
Use a Torque Wrench
Guessing is not an option. Lug nuts need a specific level of tightness. Most cars fall between 80-100 ft-lbs, but check the manual. Anything less is dangerous. Anything more makes future removal a struggle.
Tighten in a Star Pattern
Do not go in a circle. Start with one lug nut, then tighten the one directly across from it. Keep going in a crisscross pattern. That keeps pressure even and prevents warping or misalignment.
Never Use an Impact Wrench for Final Tightening
Impact wrenches are fine for removal, but tightening with one is asking for trouble. You will overdo it. Always finish with a torque wrench to lock things in properly.
Recheck After Driving
Lug nuts settle after a few miles. Give them one last check to make sure everything is still tight. A quick retorque now prevents bigger problems later.
Final Adjustments and Double Checks
1. Slightly Raise the Vehicle
Jack it up a bit to remove the stands, then lower it so the tire just kisses the ground.
2. Use a Torque Wrench
Set the correct specification, usually indicated in foot-pounds (ft-lbs). Most passenger vehicles fall somewhere around 80-100 ft-lbs, but you’re welcome to consult the manual or a more precise chart.
3. Adopt the Star Pattern
Tighten opposite nuts in a crisscross sequence. That approach ensures even load distribution, preventing warped rims or rotors.
4. Double-check After a Short Drive
Fasteners can settle. Recheck to confirm nothing loosened up mid-commute.
Checking Pressure and Balance
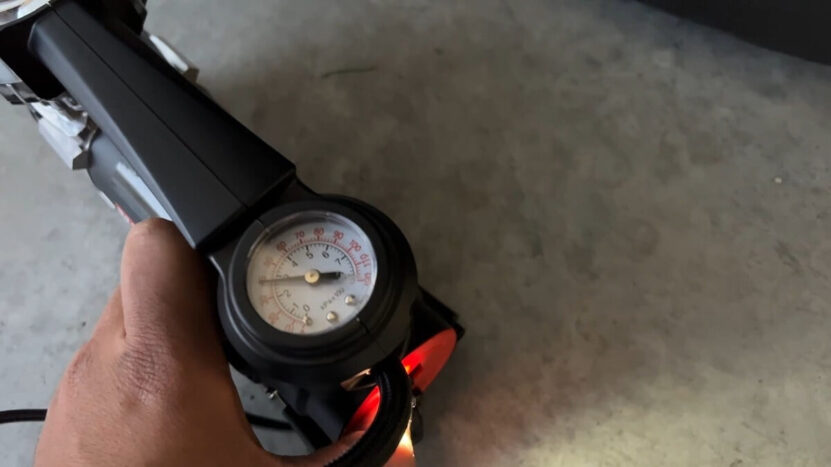
Getting the tires in place is only half the story. Air pressure affects handling, fuel efficiency, and your overall safety. Vibrations or wobbling can quickly ruin that sense of accomplishment.
Check Tire Pressure With a Gauge
Inflate to the recommended PSI found in the driver-side door jamb or the manual.
Watch for Vibrations
If the steering wheel shakes during your first spin around the neighborhood, get the wheels balanced. The local tire shop won’t mind taking your money.
Alignment Concerns
Seasonal changes can shift how your car rides. A professional alignment check might be in order if the vehicle starts drifting across lanes without permission.
Storage for Off-Season Tires
Discarding the removed set in a heap behind the garage is an option, but it’s not exactly recommended if you want them to last. Storing them properly sounds more boring than binge-watching paint dry, but it’s necessary.
- Clean thoroughly first: Road salt, grime, and other interesting substances can age the rubber prematurely.
- Stack horizontally or hang vertically: Keep them off direct concrete floors in a cool, dry area. Harsh sunlight can degrade the material over time.
- Use tire bags: Protects against dust and moisture. Also makes it less obvious that you have a car-part shrine in the corner.
- Avoid stacking too high: Nobody needs an avalanche of rubber crashing down on them.
How to Avoid Rim Damage?
A quick bullet list for the folks who think they already know it all, yet somehow manage to scratch or bend rims each season:
No Impact Wrenches for Initial Tightening
Ignoring that advice can lead to overtightening, cross-threading, or the comedic scenario of never being able to remove lug nuts again.
Never Drop the Wheel on the Hub
Unless you enjoy the terrifying clang and potential rim scuff.
Use a Real Torque Wrench Instead of Random Guesswork
Let’s just say your elbow isn’t a calibrated device.
Rim Protectors Are a Worthwhile Investment
Slapping them on while handling your wheels can prevent scuffs that will haunt your resale value later.
Last Words
Seasonal tire swaps can be a breeze if proper care and attention are given. A few precautions and consistent checks will preserve both performance and that shiny metal circle your friends and neighbors love to admire.
No need to dread the process next time the forecast flips from sunshine to snow or vice versa. Get out there, grab the right tools, and handle the swap with a mix of competence and witty confidence. Done well, you’ll look back and chuckle at how worry-free it really was.