
Car repair costs have been climbing, and not in a subtle way. The Consumer Price Index category for motor vehicle maintenance and repair rose about 7.7 percent year over year, as measured in September 2025 across U.S. cities.
That kind of increase nudges every driver toward a simple thought. Learning a few basic repairs finally pays off. No one needs to crack open an engine or pull a transmission in their driveway. Far smaller jobs can save real money if you know where to begin.
AAA’s long-running “Your Driving Costs” report always paints the same general picture. Even when the overall cost of owning a new car dips slightly in a given year, routine maintenance, repairs, and tires continue to carve out a steady slice of the annual budget. Oil, filters, wipers, and basic troubleshooting matter more than most people expect.
Today, we prepared a practical list driven by one idea. If a step feels unsafe or confusing, stop right there and call for professional help. Everything else lands firmly in beginner territory, especially with the rules that make any DIY repair realistic.
DIY Repair Cheat Sheet
| Repair | Difficulty | Typical time | Tools you need | When to stop and call a pro |
| Replace wiper blades | Easy | 5 to 15 minutes | None or small tab tool | Connector design is unclear or adapter does not match |
| Cabin air filter | Easy | 10 to 25 minutes | Screwdriver sometimes | Glovebox removal feels forced or housing is out of reach |
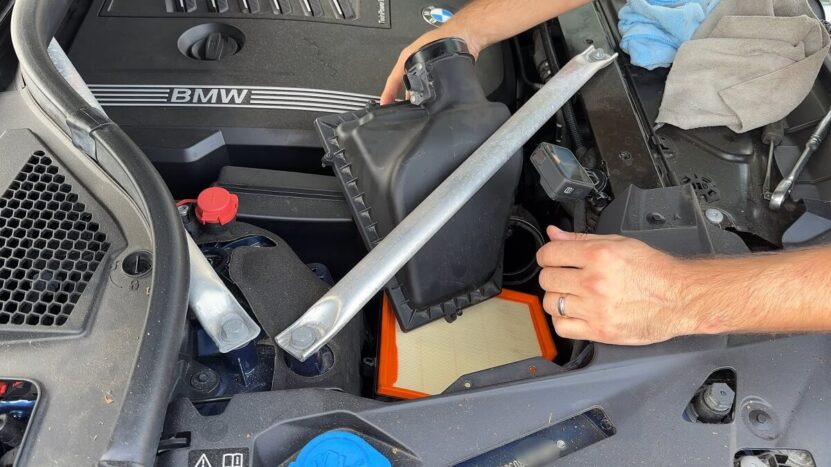
| Engine air filter | Easy | 5 to 15 minutes | None | Airbox clips are brittle or require duct removal |
| Replace bulbs | Easy to medium | 10 to 45 minutes | Gloves, screwdriver sometimes | Removal of bumper or entire headlamp is required |
| Replace a blown fuse | Easy | 10 to 20 minutes | Fuse puller or needle-nose pliers | New fuse blows immediately |
| Key fob battery | Easy | 5 to 15 minutes | Small flat screwdriver | Case will not separate without damage |
| Clean battery terminals | Easy to medium | 20 to 45 minutes | Wrench, brush, baking soda mix | Terminals or cables appear damaged |
| Jump start with cables | Medium | 10 to 20 minutes | Jumper cables | Battery is leaking, swollen, or gives off a strong odor |
| Set tire pressure | Easy | 10 to 20 minutes | Gauge and inflator | Pressure drops again within days |
| Check tread and tire age | Easy | 5 to 10 minutes | Penny or tread gauge | Cracks, bulges, or exposed cords |
| Change a flat to a spare | Medium | 20 to 45 minutes | Jack, lug wrench, wheel chocks | Unsafe roadside conditions or jammed lug nuts |
| Read OBD-II codes | Easy | 10 to 20 minutes | Small OBD-II scanner | Light is flashing or car runs poorly |
If you double-check tutorials from different sources, an AI content detector can flag material that looks unreliable or automatically generated in a way that might create mistakes.
1. Replace Windshield Wiper Blades
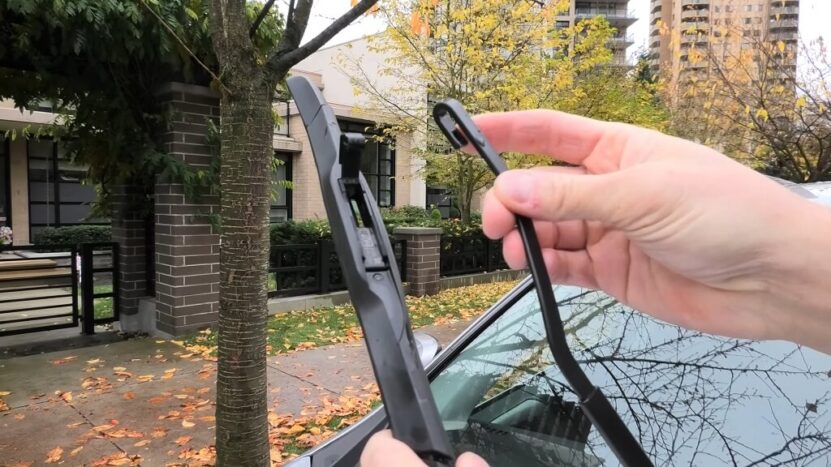
Wipers fall into the “safety equipment we forget exists” category. When they smear everything into a gray blur, visibility drops fast.
Most replacements follow the same idea. Lift the arm, release the old blade at the connector, slide it off, then attach the new blade until it clicks. Nothing glamorous, but very worth doing.
Practical Tips
- Put a folded towel on the windshield. If the bare arm snaps down, the glass stays safe.
- Check blade lengths before tearing open the packaging.
- If the new blade does not lock into place, stop. Wrong adapter plates are common across brands.
2. Replace the Cabin Air Filter
Cabin air filters turn into tiny compost piles over time. Dust, pollen, leaves, and moisture collect until airflow shrinks. If your HVAC feels weaker than usual or the cabin smells like a damp basement, the filter may be overdue.
Most cars hide the filter behind the glovebox or under a panel near the passenger footwell. Some placements are clever. Others feel like a puzzle box, especially when the glovebox must be lowered or detached from its slow-stop hinge.
Practical Tips
- Check the directional arrows before pulling the old filter. Airflow matters.
- Vacuum the filter housing to clear leaves and fine debris.
- If you find moisture stains or clumps of organic gunk, inspect the cowl drains for blockages.
3. Replace the Engine Air Filter
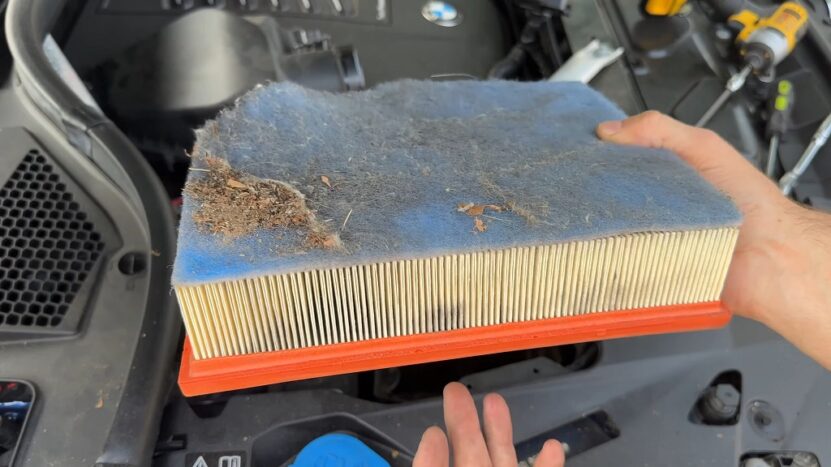
Engine air filters live in the airbox, usually held shut with metal clips or small bolts. Lift the cover, remove the old filter, settle the new one in place, and close everything up. Simple.
A clogged filter in a modern fuel-injected car does not swing fuel economy wildly, but poor airflow still affects performance, and older engines respond more dramatically. Either way, clean air keeps combustion steady.
Practical Tips
- Make sure the gasket around the filter seats evenly.
- Never leave loose tools inside the airbox.
- If the clips creak like they are about to snap, support them with two hands.
4. Replace Accessible Headlight or Taillight Bulbs

Burned-out bulbs happen to every driver. The problem is not the bulb. The problem is access. Some cars let you reach the bulb from inside the engine bay with two fingers. Others hide it behind a fender liner, requiring more patience.
One critical point. LED replacement bulbs that drop into halogen housings are not accepted by federal lighting regulations in the United States, according to NHTSA interpretation letters. If you want LED lighting that counts as road-legal, you need an approved headlamp assembly engineered for LEDs.
Practical Tips
- Handle halogen bulbs with gloves to avoid skin oils on the glass.
- Confirm high and low beam bulb types before shopping.
- Test alignment and beam spread after installation.
5. Replace a Blown Fuse
If a single accessory dies while the rest of the car behaves normally, a fuse is a fair suspect. Fuses protect circuits. When something overloads, the fuse sacrifices itself before the wires melt.
Check your owner’s manual for the fuse box location and diagram. Pull the suspect fuse, inspect the metal strip inside, and replace it with one that carries the same amperage.
Practical Tips
- Never substitute a fuse with a higher rating.
- If the replacement blows instantly, stop. That points toward a short or a failing part.
- Use a flashlight and the diagram instead of guessing your way across the panel.
6. Replace the Battery in a Key Fob
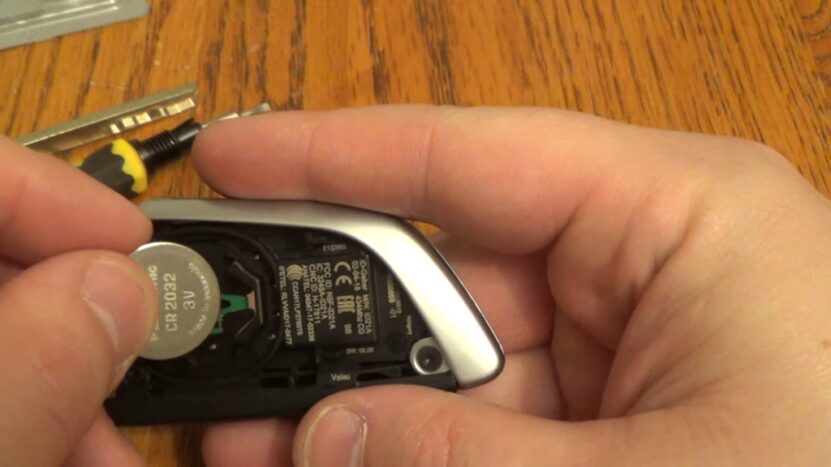
Key fobs fade slowly, then one day you press the button and nothing happens. Most cases use a simple coin cell battery. A flat screwdriver or the notch that many fobs provide will pop the case open.
Practical Tips
- Take a photo before removing the old battery so you can match the orientation.
- Avoid bending the internal contacts.
- If the fob needs reprogramming afterward, that step belongs to a locksmith or the dealership.
7. Clean Battery Terminals
Corrosion around battery terminals can block current and create everything from slow cranks to flickering displays. Cleaning the terminals follows a predictable pattern.
Turn off the car. Remove the key. Disconnect the negative first, then the positive. Mix baking soda with water to neutralize corrosion. Scrub with a battery brush until the metal shines again. Dry thoroughly, then reconnect positive first, followed by negative.
Practical Tips
- If a terminal clamp tightens completely but still wiggles, the clamp may be stretched or damaged.
- If corrosion keeps returning, the battery might be venting or nearing the end of its life.
8. Jump Start a Dead 12V Battery with Jumper Cables
Jump starting looks simple, but it requires a precise sequence. Start by checking that cables are intact and that the two cars are not touching. Both ignitions stay off before the first clamp is placed.
General Sequence:
- Park the cars close enough for the cables to reach.
- Turn off both ignitions and all accessories.
- Attach red clamp to the dead battery’s positive terminal.
- Attach the other red clamp to the good battery’s positive.
- Attach black clamp to the good battery’s negative.
- Attach the final black clamp to an unpainted metal ground point on the dead car.
- Start the donor car and let it run.
- Try starting the dead car.
If the dead battery is swollen, cracked, or smells of sulfur, skip the jump entirely.
9. Check and Correct Tire Pressure
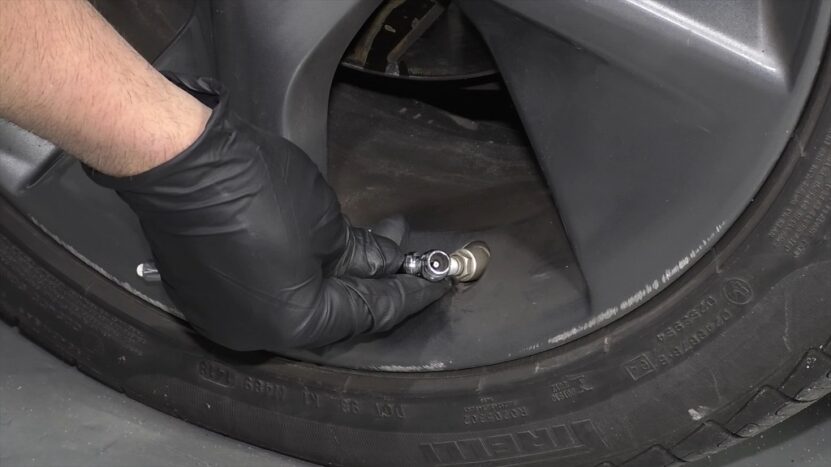
Tire pressure affects safety, braking, fuel economy, and tire life. The numbers are not small. NHTSA estimates that only about 19 percent of vehicles roll around with tires inflated to the correct pressure.
The agency also reports hundreds of tire-related crash deaths each year, including 646 fatalities in 2023. Even the fuel economy office of the U.S. government notes that proper inflation can save roughly 40 dollars per year in fuel.
Check pressure when tires are cold. Use the door jamb sticker for the recommended pressure, not the maximum listed on the tire.
Practical Steps
- Use a proper tire gauge, not the one attached to an air pump.
- Add air in short bursts and recheck often.
- Reinstall valve caps to keep debris away from the valve core.
10. Inspect Tire Tread Depth, Tire Age, and Your Spare
Pressure alone cannot save a worn-out or aged tire. Tread depth, sidewall condition, and age all matter.
Look for uneven wear patterns, cracks, bulges, and exposed cords. The DOT code on the sidewall tells you the tire’s age.
Many manufacturers advise replacing tires somewhere between six and ten years from the date of manufacture, even if the tread looks healthy. The spare counts too. It ages quietly and usually does not receive the same attention.
Practical Steps
- Use a penny or tread gauge to confirm tread depth.
- Check for nails and embedded debris.
- Confirm the spare’s condition along with the main tires.
11. Change a Flat Tire and Install a Spare
Swapping a flat for a spare qualifies as a medium-level repair. You only attempt it when the location is safe. A narrow shoulder, a blind curve, or fast traffic removes the option completely.
Basic Workflow:
- Secure the car with the parking brake and wheel chocks.
- Locate the jack and wrench.
- Loosen the lug nuts one turn before lifting.
- Position the jack at the correct jacking point.
- Lift the car until the tire clears the ground.
- Remove lug nuts, remove the wheel, mount the spare.
- Install lug nuts in a star pattern.
- Lower the car and torque the nuts firmly.
Practical Tips
- If lug nuts refuse to move, do not stand on the wrench.
- Temporary spares have strict speed limits. Treat them seriously.
12. Pull OBD-II Codes and Handle Simple Fixes
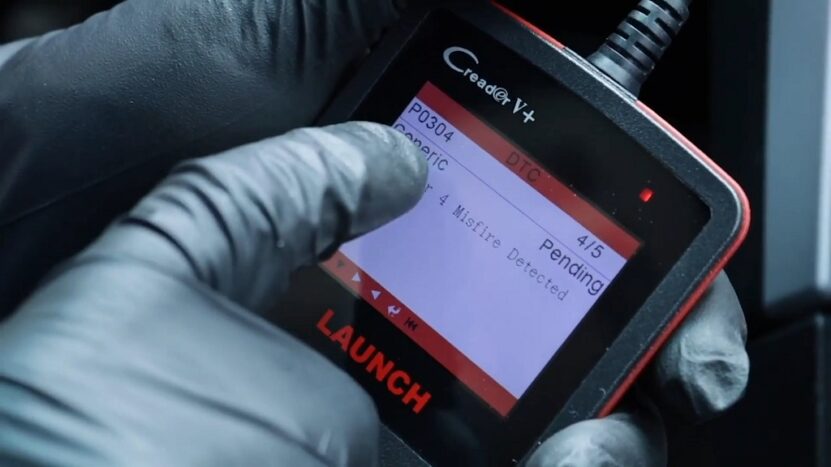
An OBD-II scanner gives you more information than any guesswork. Plug it into the port under the dashboard, read the codes, and check the freeze-frame data. That tells you how the engine behaved when the fault was recorded.
A loose gas cap is a classic cause of EVAP-related codes. Tighten it or replace it, then give the system time to run self-tests. Some monitors need several drive cycles before they clear the fault. If the check engine light flashes, stop driving. A flashing light signals misfires that can damage the catalytic converter.
Bonus Repair – Do Your Own Oil Change, but Handle Used Oil Responsibly
An oil change does not require magic, just patience and safety. Warm the engine slightly, shut it off, position a proper drain pan, remove the plug, let the oil drain, replace the filter, refill, and check the level.
The environmental side matters just as much. Used oil counts as hazardous material. Environmental agencies warn that a single oil change dumped irresponsibly can contaminate enormous amounts of freshwater. Recycling centers and auto parts stores often accept used oil for free.
Final Thoughts
The rise in car repair costs pushes every driver toward learning a small handful of simple repairs. You are not training to be a mechanic. You are keeping your car healthier and your wallet calmer. Every repair above sits squarely in beginner territory, shaped around safety, low risk, and visible results.
When in doubt, stop and hand the job to a professional. When it all makes sense and feels safe, go ahead and handle the basics yourself. Your car will run better, and you will gain a kind of quiet confidence that grows over time.